本文旨在不禁用系统完整性保护 (SIP) 或者仅禁用一次的情况下,实现永久在任意 Mac 上使用 Xcode LLM / Apple Intelligence。
⚠️注意
Xcode LLM 仅支持在 macOS 15.0 及更高版本上使用。
Apple Intelligence 仅支持在 macOS 15.1 及更高版本上使用。

Mac上使用Xcode LLM / Apple Intelligence:Darwin Eligibility Override
注意事项
这个项目仅用于学习和研究目的。
如果您选择使用此项目,您将自行承担风险,并有责任遵守任何适用法律。
本项目的作者对您使用本项目可能产生的任何后果概不负责。
使用方式
方案一 util 工具(推荐)
在脚本执行期间需要临时禁用一次 SIP 并在启动参数中添加 “amfi_get_out_of_my_way=1″。
Tip
如果你在如何禁用 SIP 或设置启动参数方面遇到问题,请参阅手动执行部分以了解更多详细信息。
# Force XcodeLLM to be eligible
curl -L https://raw.githubusercontent.com/Kyle-Ye/XcodeLLMEligible/release/0.2/scripts/override.sh | bash -s -- install util xcodellm
# Force Apple Intelligence to be eligible
curl -L https://raw.githubusercontent.com/Kyle-Ye/XcodeLLMEligible/release/0.2/scripts/override.sh | bash -s -- install util greymatter
# Force Cleanup to be eligible
curl -L https://raw.githubusercontent.com/Kyle-Ye/XcodeLLMEligible/release/0.2/scripts/override.sh | bash -s -- install util strontium
# For Apple Intelligence + Cleanup
curl -L https://raw.githubusercontent.com/Kyle-Ye/XcodeLLMEligible/release/0.2/scripts/override.sh | bash -s -- install override greymatter+strontium
# For XcodeLLM + Apple Intelligence + Cleanup
curl -L https://raw.githubusercontent.com/Kyle-Ye/XcodeLLMEligible/release/0.2/scripts/override.sh | bash -s -- install override xcodellm+greymatter+strontium
方案二 override 文件
完全不需要禁用 SIP。
# Override XcodeLLM only
curl -L https://raw.githubusercontent.com/Kyle-Ye/XcodeLLMEligible/release/0.2/scripts/override.sh | bash -s -- install override xcodellm
# Override Apple Intelligence only
curl -L https://raw.githubusercontent.com/Kyle-Ye/XcodeLLMEligible/release/0.2/scripts/override.sh | bash -s -- install override greymatter
⚠️注意
override 文件方案是互斥的。
本仓库仅提供了单独了 Xcode LLM 和 Apple Intelligence 的 override 文件。
如果需要覆盖多个,请使用 util 工具方案分别覆盖后导出 override 文件供自己未来使用。
卸载
方案一 util 工具
# For XcodeLLM:
curl -L https://raw.githubusercontent.com/Kyle-Ye/XcodeLLMEligible/release/0.2/scripts/override.sh | bash -s -- uninstall util xcodellm
# For Apple Intelligence
curl -L https://raw.githubusercontent.com/Kyle-Ye/XcodeLLMEligible/release/0.2/scripts/override.sh | bash -s -- uninstall util greymatter
# For Clenaup as part of Apple Intelligence feature
curl -L https://raw.githubusercontent.com/Kyle-Ye/XcodeLLMEligible/release/0.2/scripts/override.sh | bash -s -- uninstall util strontium
方案二 override 文件
# For XcodeLLM:
curl -L https://raw.githubusercontent.com/Kyle-Ye/XcodeLLMEligible/release/0.2/scripts/override.sh | bash -s -- uninstall override xcodellm
# For Apple Intelligence
curl -L https://raw.githubusercontent.com/Kyle-Ye/XcodeLLMEligible/release/0.2/scripts/override.sh | bash -s -- uninstall override greymatter
# For Apple Intelligence + Cleanup
curl -L https://raw.githubusercontent.com/Kyle-Ye/XcodeLLMEligible/release/0.2/scripts/override.sh | bash -s -- uninstall override greymatter+strontium
# For XcodeLLM + Apple Intelligence + Cleanup
curl -L https://raw.githubusercontent.com/Kyle-Ye/XcodeLLMEligible/release/0.2/scripts/override.sh | bash -s -- uninstall override xcodellm+greymatter+strontium
手动执行
方案一 util 工具 (推荐)
- 在恢复模式下通过
csrutil disable禁用 SIP - 添加启动参数
sudo nvram boot-args="amfi_get_out_of_my_way=1"并重启 - 从发布页面下载可执行文件
eligibility_util并添加执行权限。
以下的命令假设下载的文件在
~/Downloads文件夹。
chmod +x ~/Downloads/eligibility_util
- 执行以下命令
cd ~/Downloads
# For XcodeLLM:
./eligibility_util forceDomainAnswer --domain-name OS_ELIGIBILITY_DOMAIN_XCODE_LLM --answer 4
# For Apple Intelligence (macOS 15.1+ required)
./eligibility_util forceDomainAnswer --domain-name OS_ELIGIBILITY_DOMAIN_GREYMATTER --answer 4
# For Cleanup as part of Apple Intelligence feature (macOS 15.1 Beta 3+ required)
./eligibility_util forceDomainAnswer --domain-name OS_ELIGIBILITY_DOMAIN_STRONTIUM --answer 4
- 在恢复模式下通过
csrutil enable恢复 SIP - 删除启动参数
sudo nvram -d boot-args
如果你不熟悉 SIP 操作,请阅读 Disabling and Enabling System Integrity Protection。
你只能在恢复模式或禁用 SIP 的普通模式下设置boot-args。
设置boot-args后,记得重新启动以使更改生效。
Tip
更多技术细节,请参阅 Kyle-Ye/eligibility
方案二 override 文件
完全不需要禁用 SIP。
- 从发布页面下载需要的
*.eligibility_overrides.data文件并重命名为eligibility_overrides.data
对于 Xcode LLM,下载 xcodellm.eligibility_overrides.data
对于 Apple Intelligence,下载 greymatter.eligibility_overrides.data
- 在
/private/var/root/Library/Daemon\ Containers下找到eligibilityd的容器 UUID
通过以下命令查看所有的 UUID
sudo ls /private/var/root/Library/Daemon\ Containers
- 将第一步下载的文件移动到相应的 Deamon 容器的
Data/Library/Caches/NeverRestore/文件夹中。如果您不确定哪个是 eligibilityd 的容器目录,您可以一个一个地尝试,或者将下载的文件添加到所有 Deamon 容器中。
sudo mkdir /private/var/root/Library/Daemon\ Containers/<UUID>/Data/Library/Caches/NeverRestore
sudo cp eligibility_overrides.data /private/var/root/Library/Daemon\ Containers/<UUID>/Data/Library/Caches/NeverRestore/
- 重启 eligitbilityd 服务
sudo pkill -9 eligibilityd
sudo launchctl kickstart -k system/com.apple.eligibilityd
故障排除
Tip
eligibility_util 和 eligibility_util_sip 的区别在于,后者可以用于开启了SIP的环境(仅部分功能可用)。
方案一 util 工具问题
- 如果看到以下输出
zsh: no such file or directory: ./eligibility_util
请确保当前工作路径含有 eligibility_util 的文件。
- 如果看到以下输出
zsh permission denied: ./eligibility_util
请确保已添加了执行权限 chmod +x ./eligibility_util。(检查手动执行的第 3 步)
- 如果看到以下输出
>[1] 61672 killed ./eligibility_util
请确保已禁用了 SIP 设置了正确的 boot-args 并已重启。(检查手动执行的第 1 步和第 2 步)
- 其他问题
curl -L https://raw.githubusercontent.com/Kyle-Ye/XcodeLLMEligible/release/0.2/scripts/override.sh | bash -s -- doctor
方案二 override 文件问题
如果你无法访问 Daemon Container 相关文件夹,请检查你使用的终端App是否拥有完全磁盘访问权限。
路径:设置 App -> 隐私和安全性 -> 完全磁盘访问权限 -> 添加你的终端App并允许访问。
其他 Xcode LLM 相关问题
- 确认覆盖生效并且你有正确的 Answer。
./eligibility_util_sip getDomainAnswer --domain-name OS_ELIGIBILITY_DOMAIN_XCODE_LLM
- 重新启用 SIP,然后打开 Xcode 下载模型。
See detail for #4
其他 Apple Intelligence 相关问题
Important
建议:
- 登录美区 Apple ID
- 将地区设置为美国,并将英语设置为首选语音
- 将英语(美国)设置为 Siri 语言
- 确认覆盖生效并且你有正确的 Answer。
./eligibility_util_sip getDomainAnswer --domain-name OS_ELIGIBILITY_DOMAIN_GREYMATTER
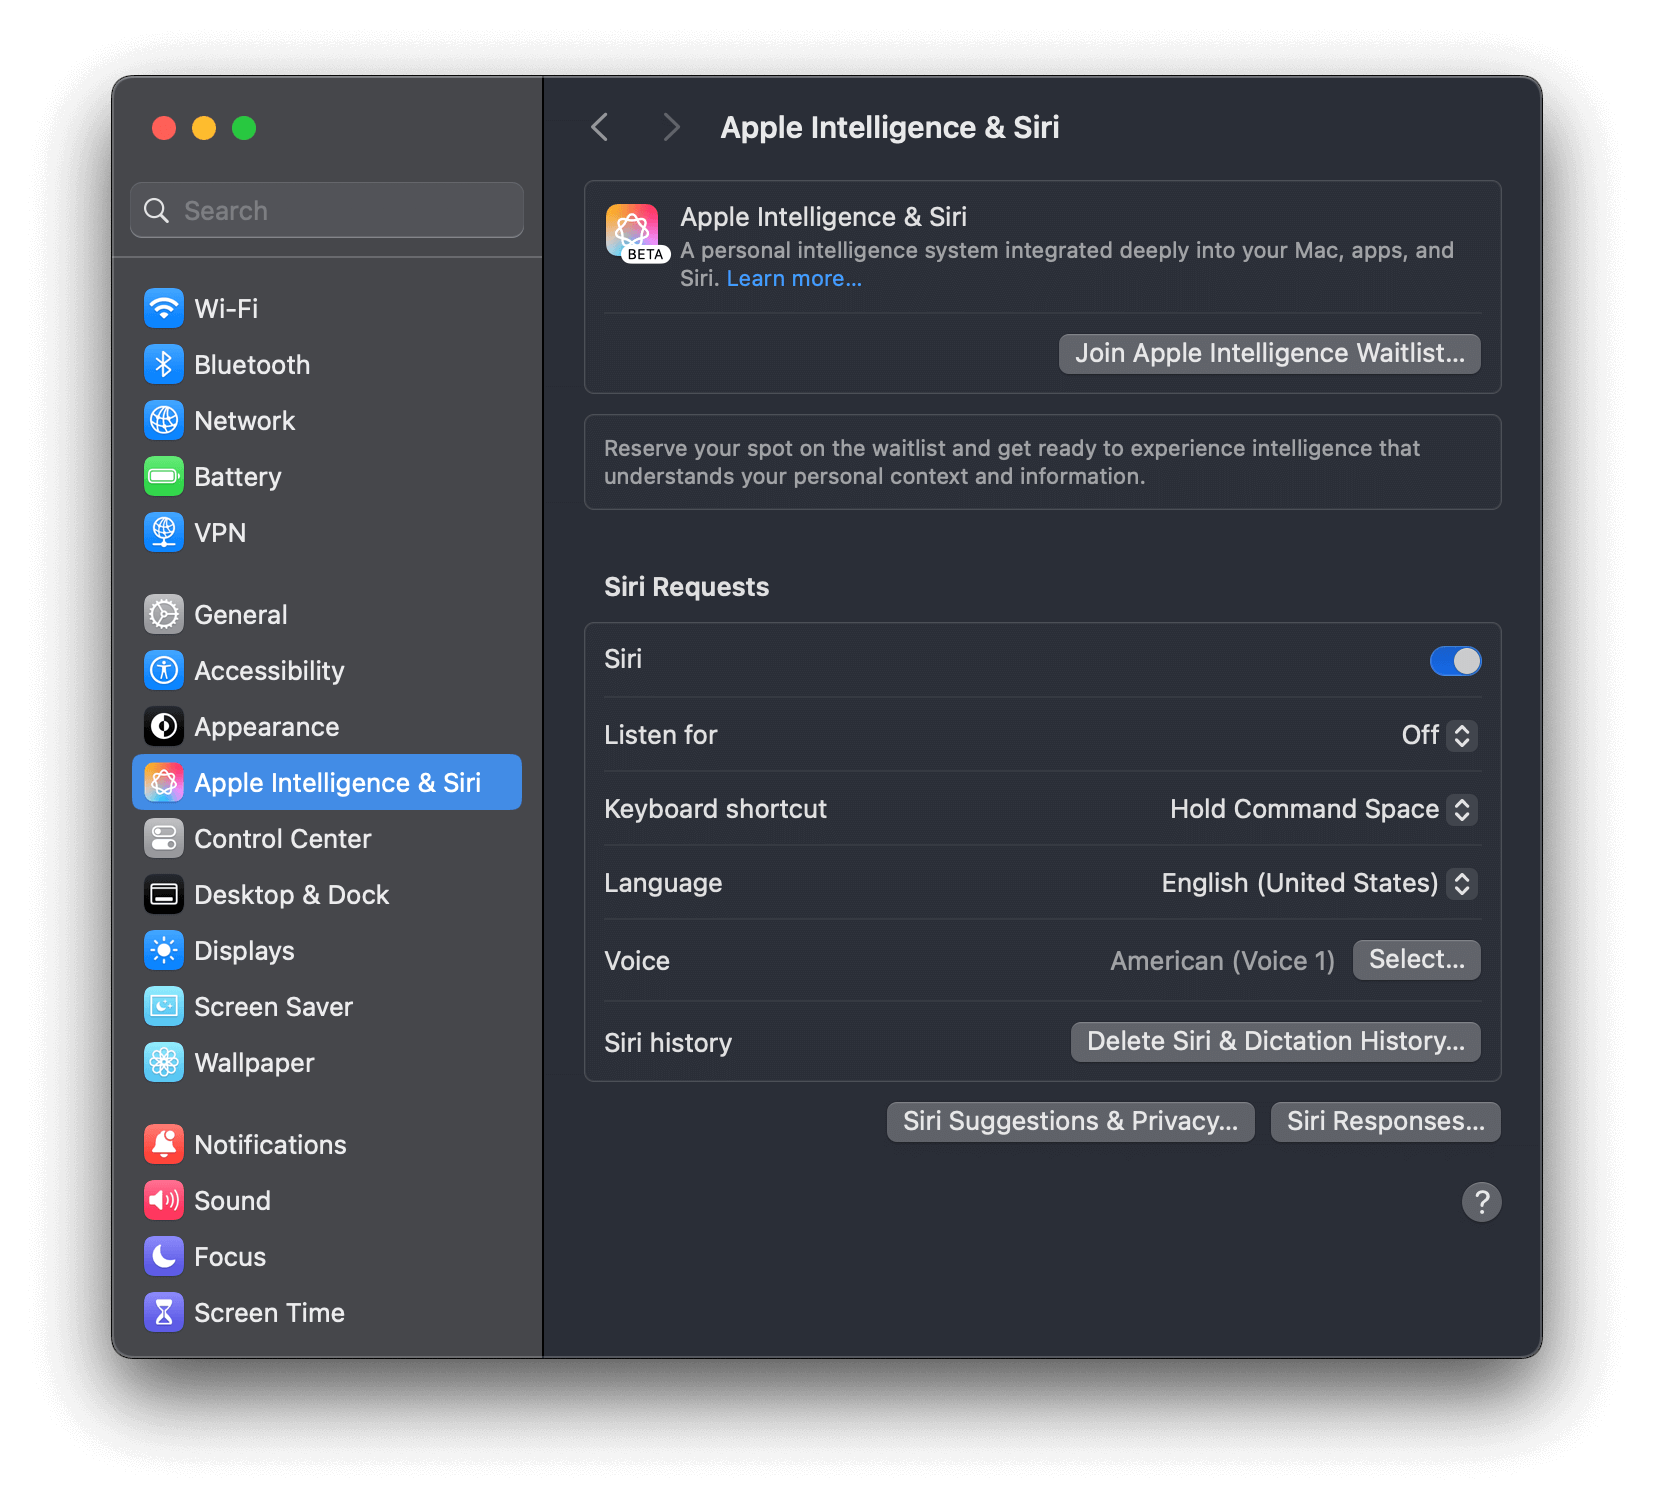
- 进入设置 App > “Apple Intelligence & Siri”,点击 “Join Apple Intelligence Waitlist” 按钮。

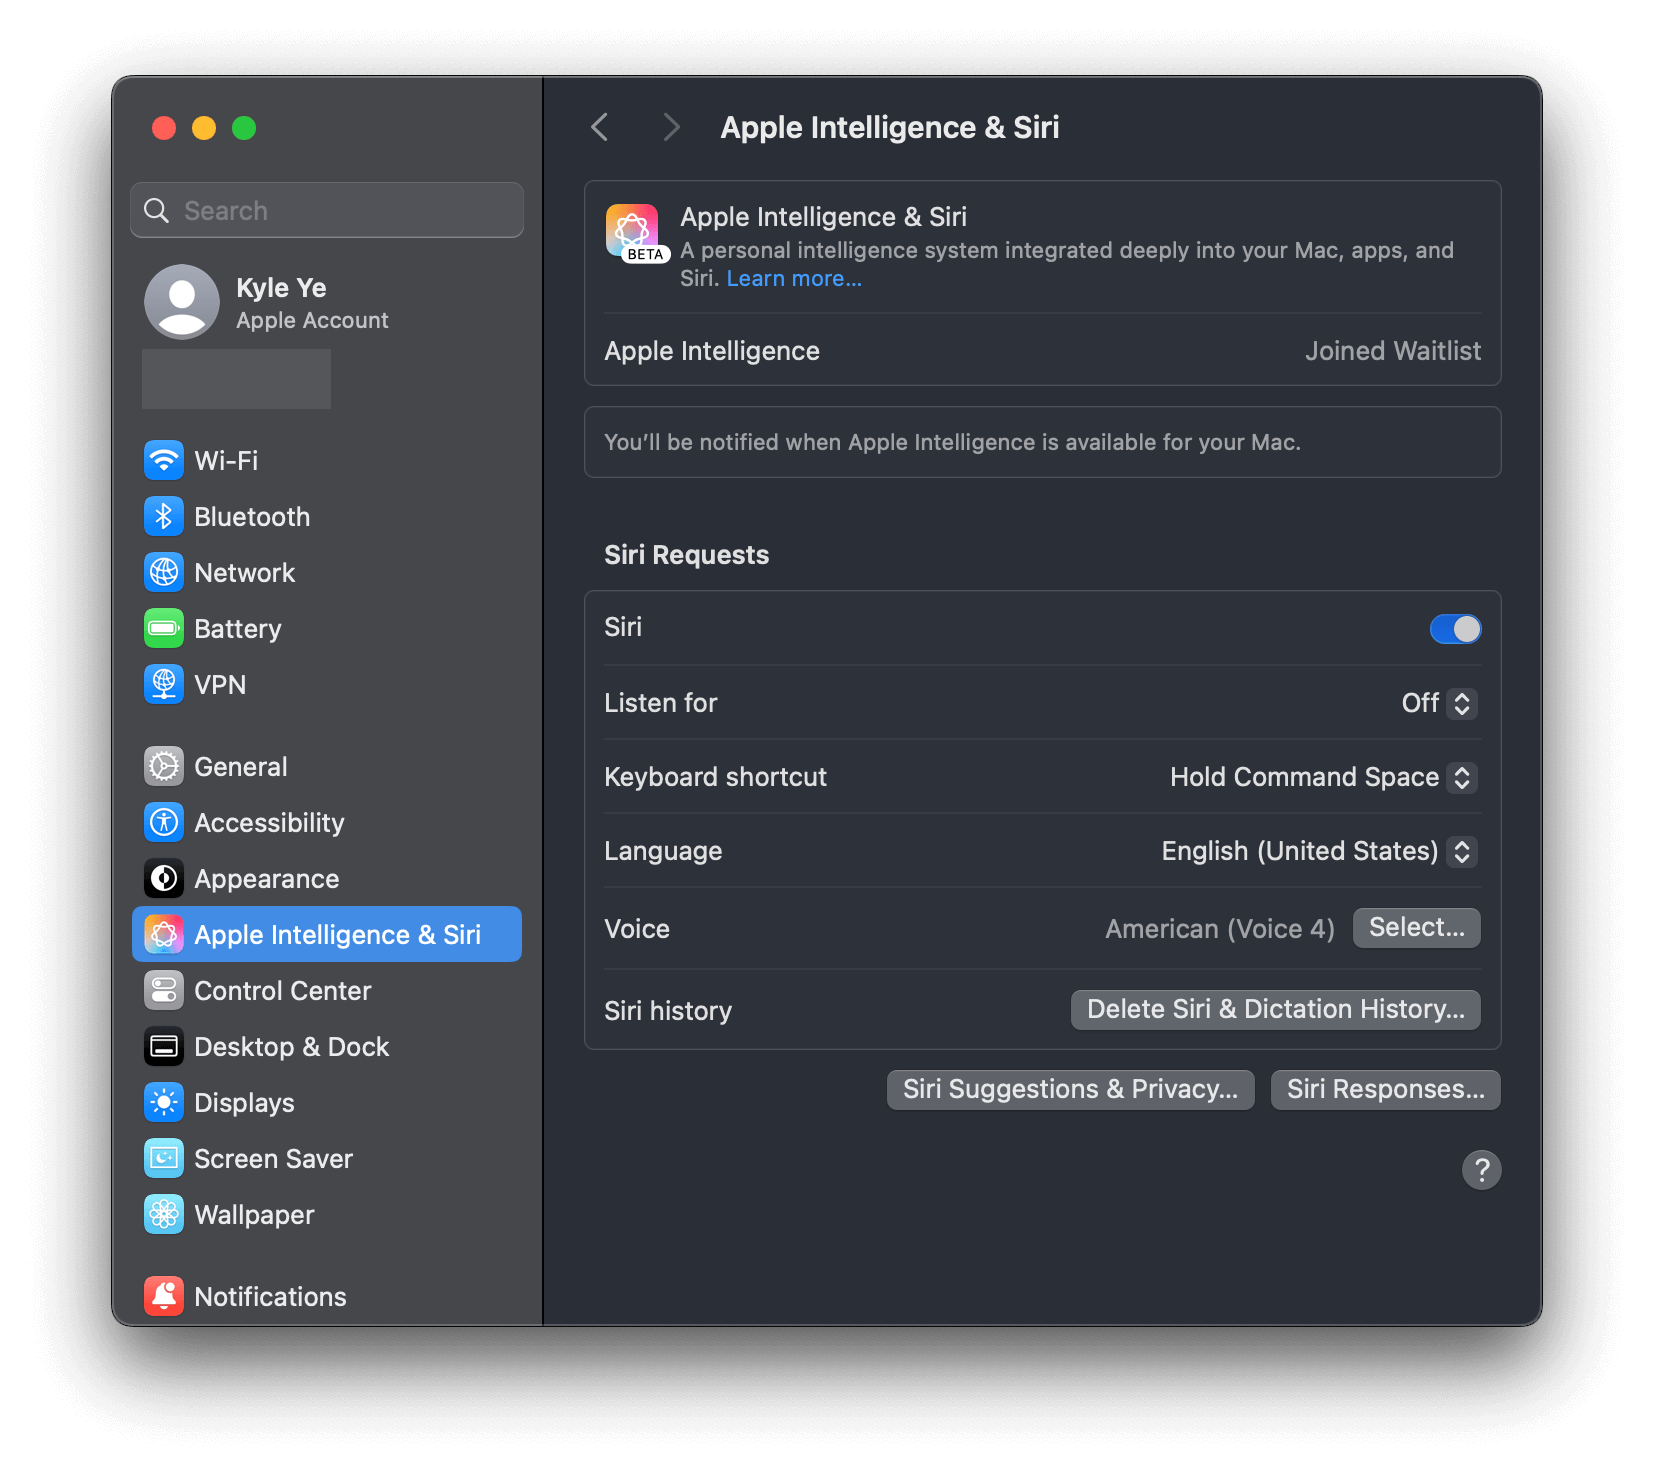
- 你将看到 “Joined Waitlist” 标签,然后耐心等待一段时间。

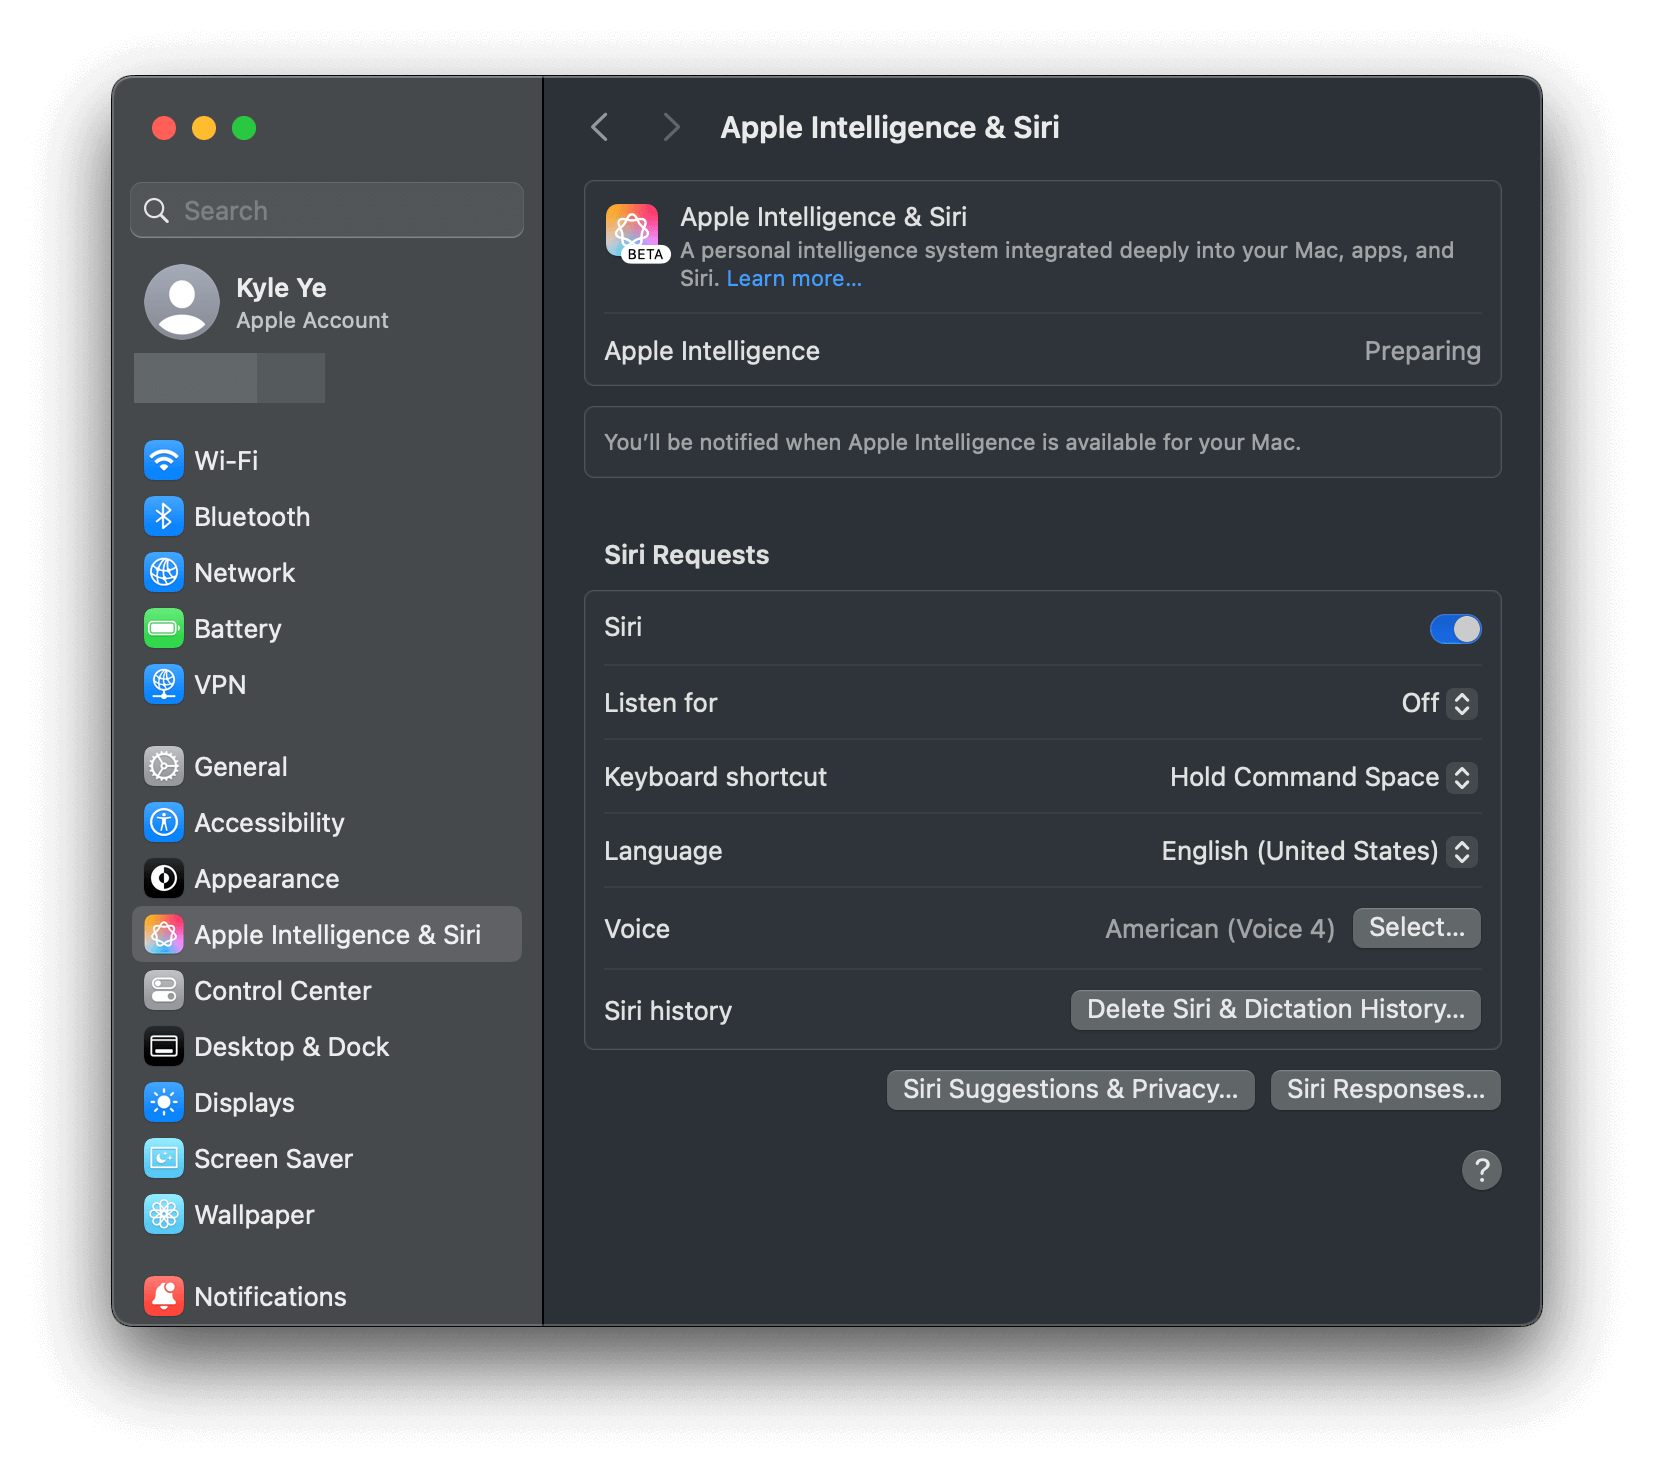
- 你将看到 “Preparing” 标签,然后继续耐心等待一段时间。

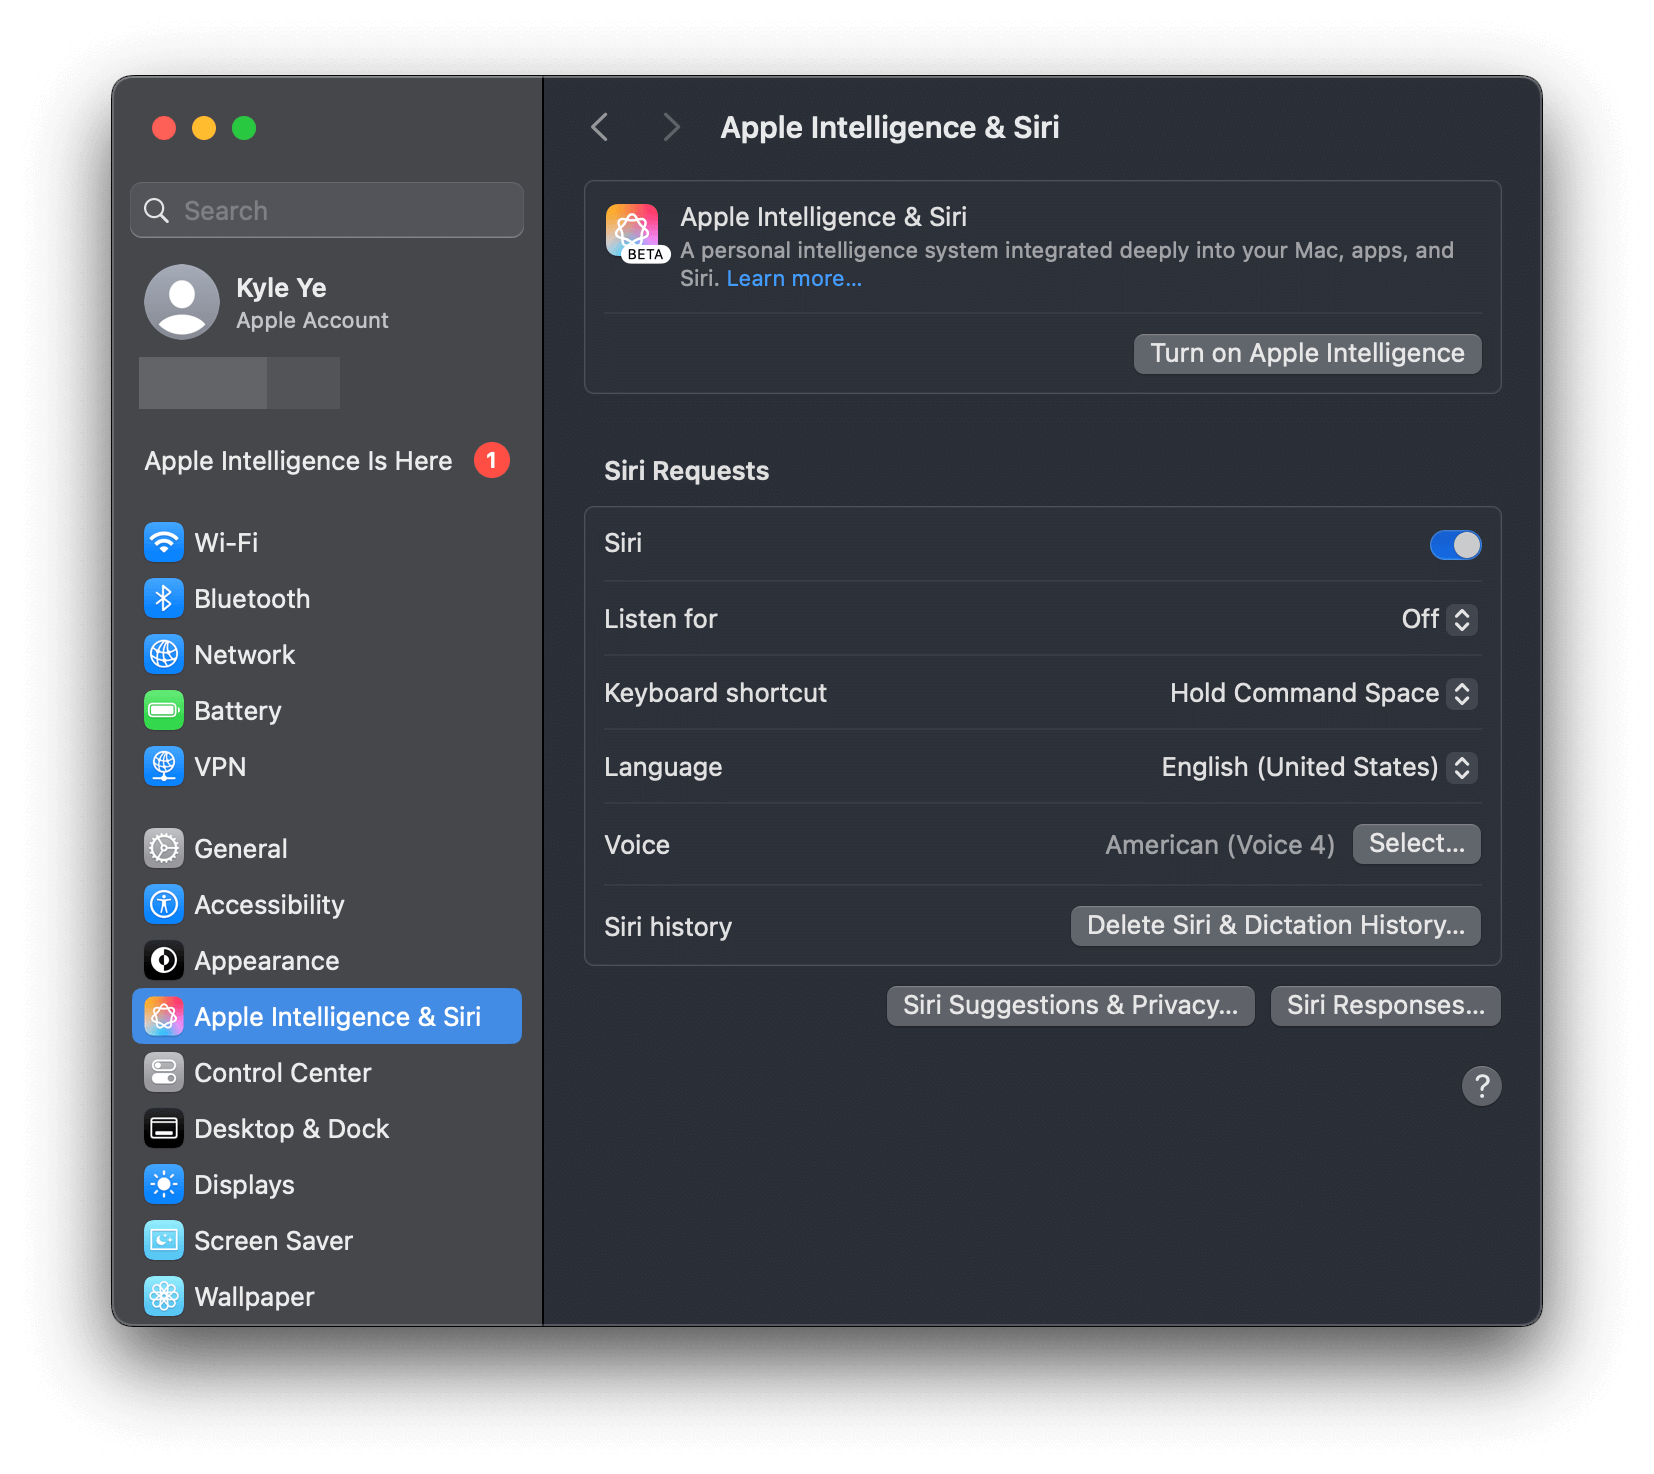
- 你将收到 “Apple Intelligence is Here” 通知。

- 你现在可以打开 Apple Intelligence 并使用它。

FAQ
- 在系统更新之后这种方式还会生效吗?
大概率会。Eligibility Override 不需要你在系统更新后再次执行一遍命名。
但是 Apple 可能会在未来更改 eligibility 机制,所以不能保证在系统更新后仍然有效。
- 为什么在设置里没有 Apple Intelligence?
Apple Intelligence 只在 macOS 15.1 及更高版本上可用。
- 为什么在设置里没有 ChatGPT 相关?
ChatGPT 集成只在 macOS 15.2 及更高版本上可用。
- 为什么开启 Apple Intelligence 后,Siri 仍然使用了百度的服务?
Siri 的搜索引擎是由你的地区语言设置和网络环境决定的。请参考互联网上的其他资料选择合适的网络代理进行配置。
eg. https://github.com/VirgilClyne/iRingo
相关链接

☝️用微信请我喝杯咖啡☕️
😛如果文章对您有用,请支持作者😛

☝️用支付宝请我喝杯奶茶🧋


